This show-and-tell post is a little different than my last few. It didn't start with a 'I wonder if I can do X' but instead a 'UGH! I'm sick of having to disable the ad blocker every time my wife shops online'.
I knew automating this definitely could be done, but how to get it done in the 'wife approved' way was the nut to crack.
I ended up settling on a combination of Home Assistant (with the Node-RED add-on installed) and the iOS Shortcuts app.
...and before you say it, I know I could have skipped the middleman and accomplished this all within the Shortcuts app...but I wanted to play around with Node-RED more.
Node-RED Bits
I've mainly used Node-RED to create quick and dirty "API" endpoints that help me to automate some very simple things.
Up till now, my most complicated flow in Node-RED consisted of 3 nodes connected to each other in a line.
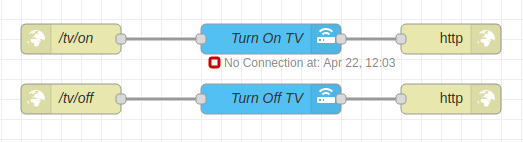
Simple Node-RED flows (ignore the 'No Connection' error) To enable my wife to disable the Pi-Hole on demand was easy enough. I Just needed to create a flow that was pretty much the same as the TV flows. One for enable and one for disable.
The problem then became 'What if she forgets to enable it again?!'. Well, I couldn't have that.
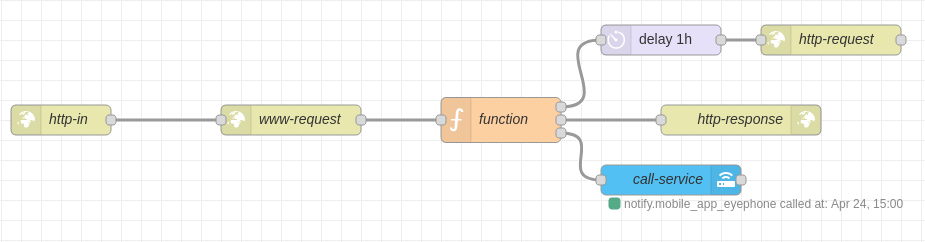
After some trial and error, I created a flow that disables the Pi-Hole, sends me a notification when it is triggered, and re-enables it after a 1 hour timer. Eventually I may add the ability to specify how long to disable the Pi-Hole.
You can find the JSON for the following flows in this code snippet.
The Nodes from the Enable Flow

Enable Flow
The first node in this flow is a http-in node. I like to organize the URL
settings for these based on who it will interact with and how it interacts with
it.
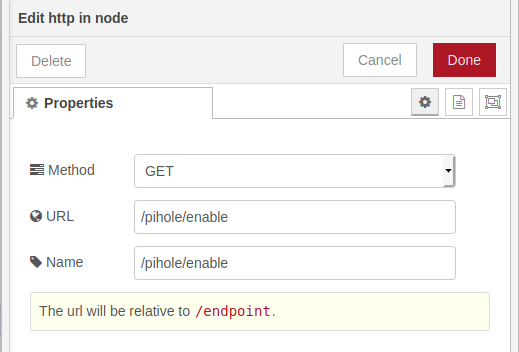 First Node (http-in)
| Setting | Value |
|---|---|
| Method | GET |
| URL | /pihole/enable |
| Name | /pihole/enable |
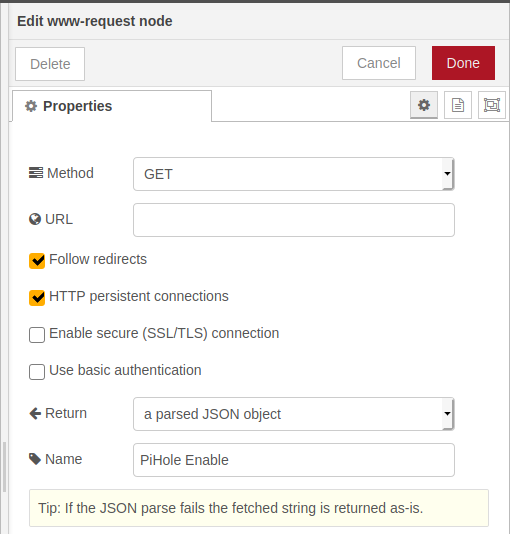
The Second Node is a www-request node. This one calls the API endpoint
to enable the PiHole.
| Setting | Value |
|---|---|
| Method | GET |
| URL | http://your-pi-hole/admin/api.php?enable&auth=SOOPER_SECRET |
| Follow redirects | True |
| HTTP persistent connections | True |
| Return | a parsed JSON object |
| Name | PiHole Enable |
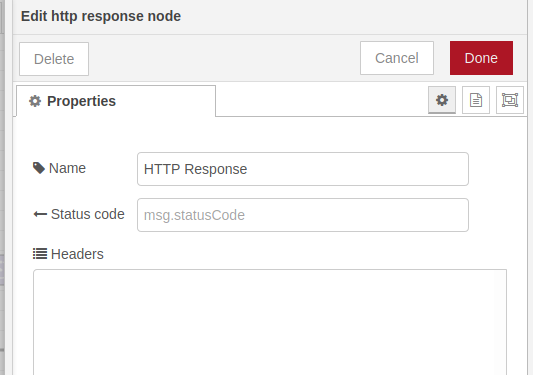
The Final Node is a http-reponse node. This just makes sure the flow has
an output. Without it the flow would hang when called from the iOS Shortcuts
app.
| Setting | Value |
|---|---|
| Name | HTTP Response |
The Nodes from the Disable Flow
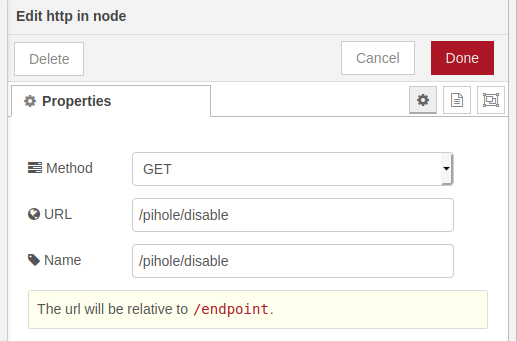
The First Node is a http-in node. Set up in the same way as the enable
endpoint from the previous flow, only this time we use 'disable' instead of
'enable'.
 First Node (http-in)
| Setting | Value |
|---|---|
| Method | GET |
| URL | /pihole/disable |
| Name | /pihole/disable |
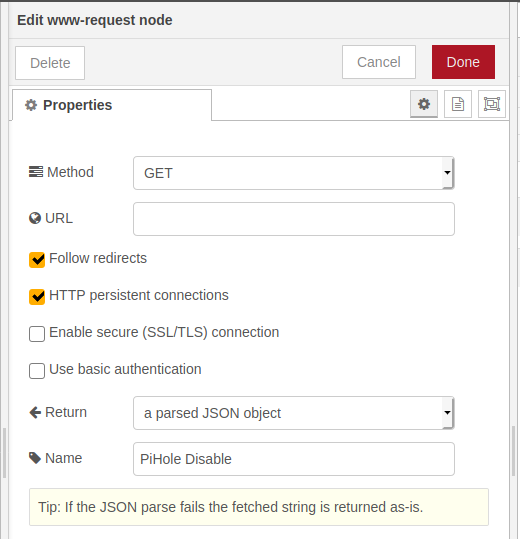
Our Second Node is a www-request node that hits the PiHole API in order
to disable the PiHole.
 Second Node (www-request)
| Setting | Value |
|---|---|
| Method | GET |
| URL | http://your-pi-hole/admin/api.php?disable&auth=SOOPER_SECRET |
| Follow redirects | True |
| HTTP persistent connections | True |
| Return | a parsed JSON object |
| Name | PiHole Disable |
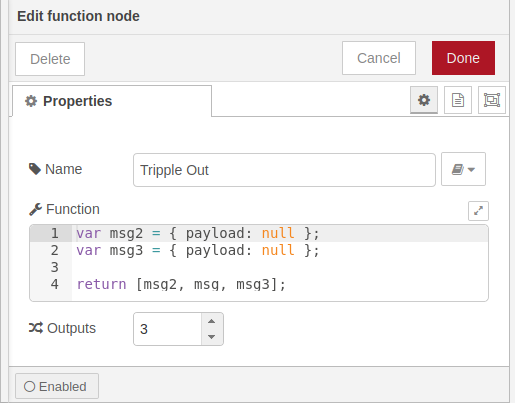
The Third Node is a function node. This is the one that took me a bit to
figure out. Up until discovering this node, I was having trouble figuring out
how to make more than 1 branch off of a node fire at the same time. I was able
to use this node to send a message out of each of the 3 outputs so that the
rest of the nodes would all fire at the same time.
| Setting | Value |
|---|---|
| Name | Tripple Out |
| Function | (I'm too damn lazy to write HTML to get a code block in this table. So see the code block right after this table) |
| Outputs | 3 |
The order is important here
We want the two null payloads to go to output 1 and 3, while the full payload goes to output 2. This way the http-response node (which is attached to the 3rd output) has an input that it can use.
var msg2 = { payload: null };
var msg3 = { payload: null };

return [msg2, msg, msg3];
delay node. This one just delays this branch of the
flow for 1 hour before continuing to the next node.
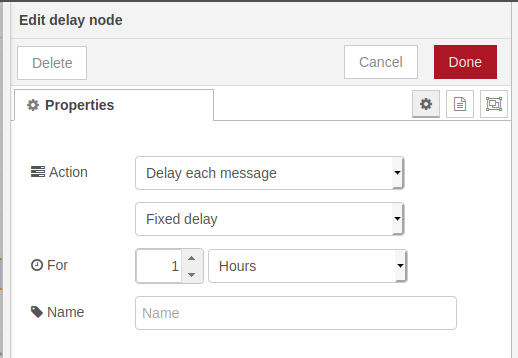 Fourth Node (delay)
| Setting | Value |
|---|---|
| Action | Delay each message |
Fixed delay |
|
| For | 1 Hours |
The Fifth Node is a http-request node. This one is fired after our delay
node and re-enables the PiHole by hitting the endpoint for the much simpler
flow that enables the PiHole.
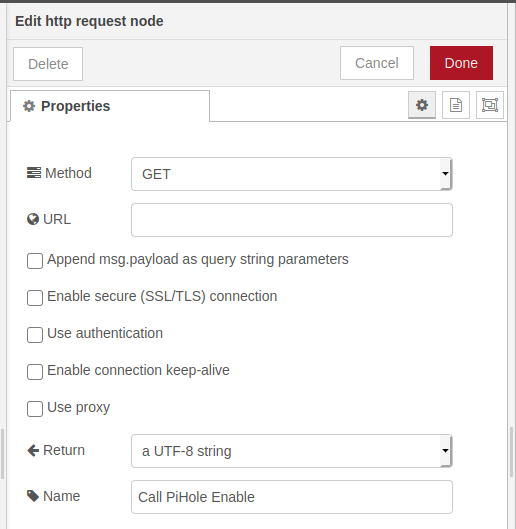 Fifth Node (http-request)
| Setting | Value |
|---|---|
| Method | GET |
| URL | http://your-hassio-ip:1880/endpoint/pihole/enable |
| Return | a UTF-8 string |
| Name | Call PiHole Enable |
The Sixth Node is a http-response node. This one ensures that when we
hit the endpoint for this flow, a response will be generated for the iOS
shortcut. Otherwise this flow would just hang when called.
 Sixth Node (http-response)
| Setting | Value |
|---|---|
| Name | HTTP Response |
Finally, our Seventh Node is a call-service node. This one calls the
Home Assistant service for sending a notification to my iPhone.
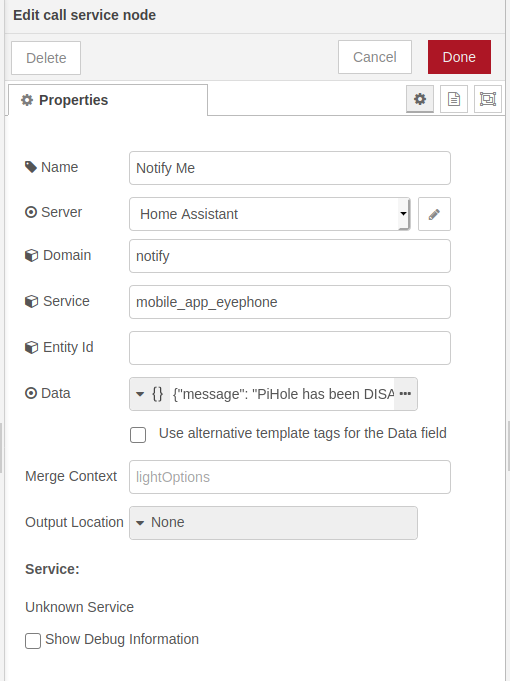 Seventh Node (call-service)
| Setting | Value |
|---|---|
| Name | Notify Me |
| Server | Home Assistant |
| Domain | notify |
| Service | mobile_app_name-of-your-iphone |
| Data | {"message": "PiHole has been DISABLED for 1 hour"} |
The iOS Shortcuts Bit
To wrap it all up in a nice package for the wife, I went with the iOS Shortcuts app. This allows both me and the wife to use a single touch or single Siri command to disable the PiHole.
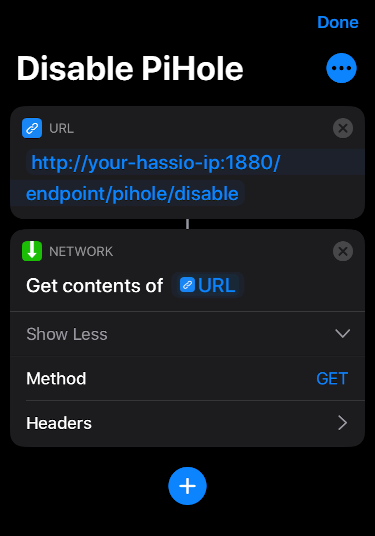
| Card | Settings |
|---|---|
| URL | http://your-hassio-ip:1880/endpoint/pihole/disable |
| Get Contents of URL | Method = GET |
The Fruit of My Labor